-
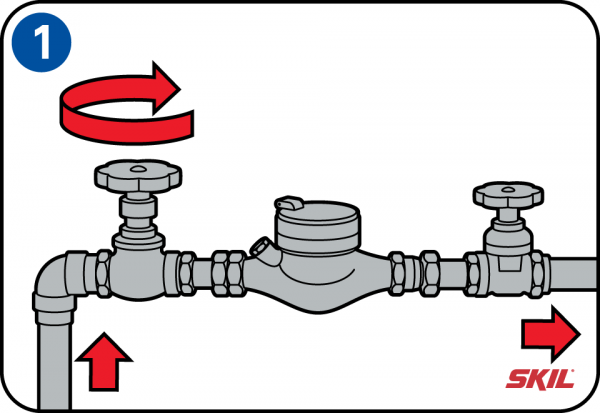
Shut-off the water supply
First shut-off the water supply by closing the main water valve. This is usually located just before the water meter.
Then open the taps and wait until no more water comes out of them.
Before you start loosening the water hoses or fittings it’s a good idea to place a cloth under the pipes, because some more water is still likely to drain out.
If there are one or more shut-off valves in the pipes leading to the tap, just close them before you start work. -
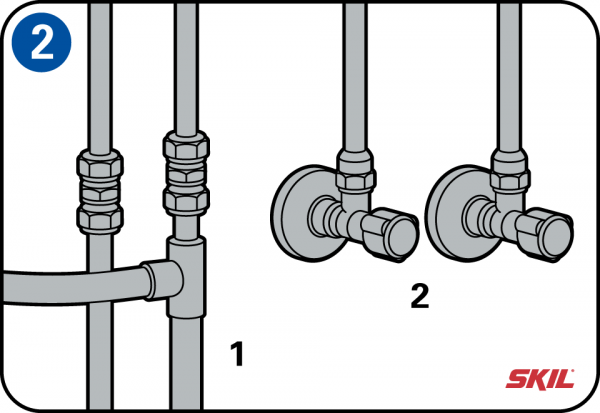
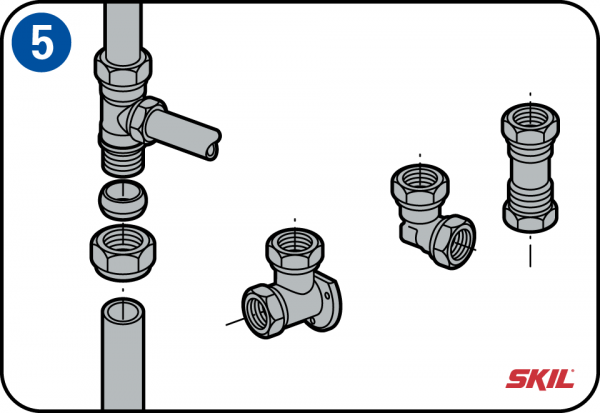
Loosen the connections
There are two possible situations:
1 The two supply pipes each end with a compression fitting
2 There are two shut-off valves in the pipes under the sink
In both cases, loosen and disconnect the joints with an adjustable wrench. -
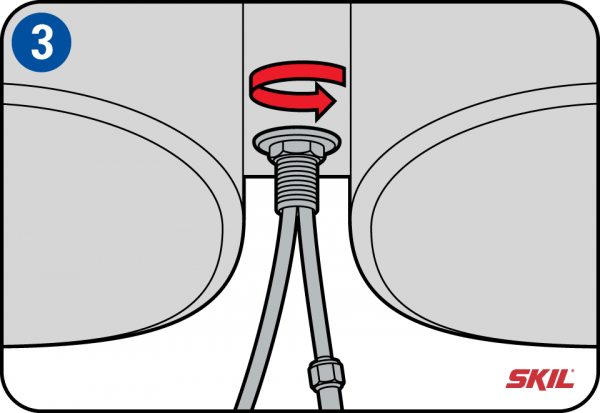
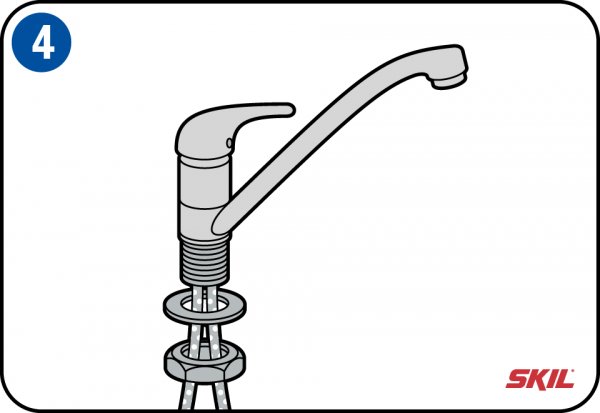
Remove the tap
At the base of the kitchen tap is a tube with an external screw thread. This protrudes through the hole in the kitchen sink or worktop, and is secured underneath by a nut, a washer and a retaining plate. Use the adjustable wrench to loosen the nut, then you can usually remove it by hand. After that you can lift the old tap out from the top.
-
Fit the new tap
The new tap will have a tube with an external screw thread at its base, just like the old one. Push the tube through the hole in the kitchen sink or worktop, push the retaining plate and washer over the tube, fit the nut and tighten it with the adjustable wrench or water pump pliers. Check that the tap is facing in the right direction. If you’ve installed a new stainless steel kitchen sink or composite worktop you’ll have to drill a new hole of the right diameter for the mounting tube of the tap. Use a hole saw of a suitable type for the material of the sink or worktop.
-
Water supply pipes
There are two pipes inside the large mounting tube at the base of the tap, for the hot and cold water supplies. These are made of soft, flexible material and have a diameter of 10 mm. You can bend them by hand into the right position, and if necessary cut them to the required length with a pipe cutter.
Fit these supply pipes to the ends of the pipes coming out of the wall with compression fittings. The hot water is usually at the left. A wide range of compression fittings is available for different situations. -
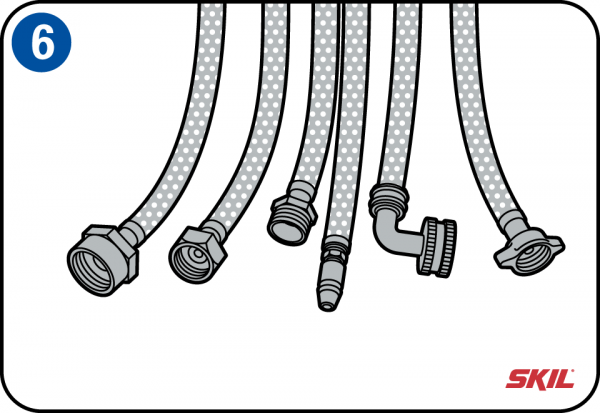
Flexible supply tubes
Flexible supply tubes are usually supplied with the new tap, but are also available separately in different lengths. The stainless steel braiding protects the flexible tube made of synthetic rubber. The ends of the tubes have connecting nuts designed to give a watertight joint. These flexible supply tubes are available in different diameters and with different kinds of connections.
-
Open the main water valve and check for leakages
After you’ve fitted the tap and tightened the joints, it’s time to open the main water valve. Before you put your tools away, first check that there are no leakages.