-
Advantages of Venetian blinds
Blinds of this kind provide excellent insulation. In the winter the warm air flows into the room, so the concave sides of the slats should face inwards. While in the summer the warm air is directed upwards, so the concave face of the slats should face outwards. These Venetian blinds can be raised and adjusted by the mechanism in the top rail.
-
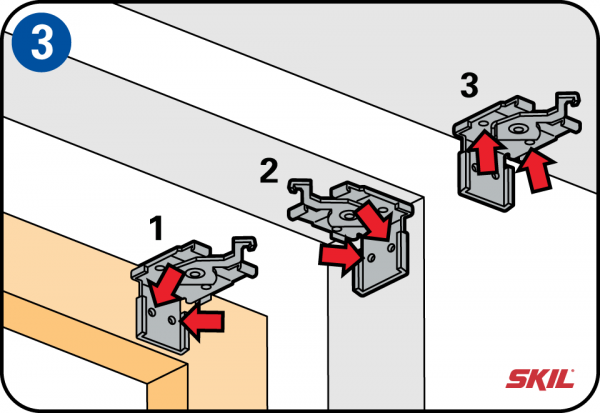
Different mounting systems
Venetian blinds are supplied with different types of mounting brackets. For example the top support of the blind can be secured by box-section brackets with a locking plate or by angle brackets with a rotary locking lever to fix the top rail in place.
-
Choosing the right place
You can fit the blinds in different ways depending on the available space and your own preference:
1. Fix them to the window frame (not recommended with plastic or aluminum window frames because the holes can’t be repaired later)
2. Fix them to the wall above the window frame
3. Fix them to the ceiling -
Fitting the mounting brackets
Locate the position of the first bracket and mark out the positions of the holes to be drilled. If you’re fitting the Venetian blind to the window frame, first predrill the holes for the screws with a thin wood drill (2.5 mm). Or if you’re fitting the blind to the wall, use a 6 mm masonry drill and insert the wall plugs. Then screw the bracket into place and partially tighten the fixing screws. Using a length of wood and a spirit level, place the mounting rail horizontally and mark out the position of the second bracket. If you need to fit a third bracket, make sure it is clear of the ladder cord or tape.
-
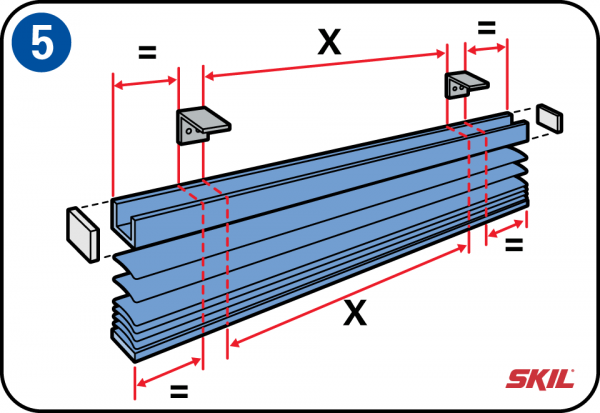
Measure the internal width
After fitting the mounting brackets, you can measure the internal width of the Venetian blind between the brackets. Mark out this width on the top and bottom rails of the blind. When you’re measuring, make sure you allow for the extra width of the end caps of the rails.
-
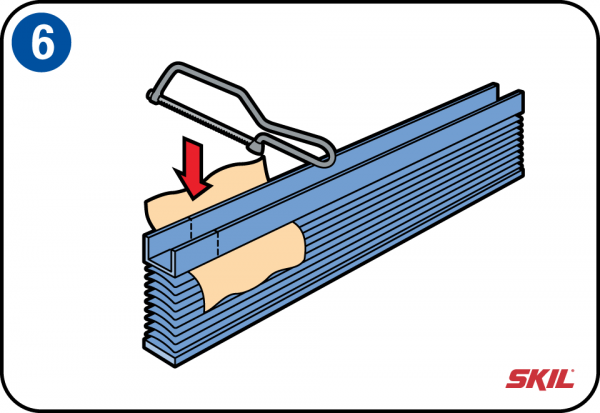
Cut the top rail to size
Cut the top and bottom rails to the right width with a hacksaw. Protect the slats with a cloth or a piece of cardboard while you’re working. Replace the end caps on the rails after sawing.
-
Cut the slats to size
Hang the blind up temporarily and mark out the internal width on the bottom slat. Make sure the blind is centered so you cut the left and right sides to size evenly. Use a special slat cutter or scissors to cut the slat to the right width. Then cut the other slats to size (you can use the piece you’ve cut off the bottom slat as a template for the other slats). Then you can hang the Venetian blind in place and lock it in the brackets.
-
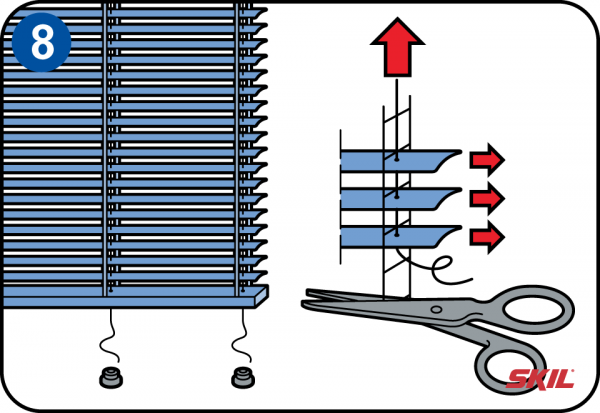
Adjust the height
If the Venetian blind is too long, there will be a thick bunch of unused slats at the bottom. You can prevent this by removing the unneeded slats. Remove the plastic end caps from the bottom rail and undo the cord at the bottom. Remove the bottom rail and take the unneeded slats out of the ladder cord or tape. Then you can replace the bottom rail and thread the cord back in place. Replace the end caps in the rail, cut the ladder cord or tape to the right length and re-tie the ends. Finally, fit the rod to open and close the Venetian blind into its holder.